Setting up a photography studio at home is a game-changer for both amateur enthusiasts and professional photographers alike. Whether you're looking to capture stunning portraits, shoot high-quality product images, or produce online creative content, having a dedicated shooting space at home is both convenient and offers control over the final product. Perfecting the right at-home setup allows you to produce high-quality images without relying on expensive external studios. To create an at-home studio, you don’t need a massive space or a huge budget, just some key equipment, thoughtful planning, and a bit of creativity.
In this guide, we'll walk you through everything you need to know about creating your own home photography studio. From selecting the right space to choosing essential gear and mastering lighting, we’ve got everything you need to know on how to transform even a small room into a professional photography space in the comfort of your own home.
Can I run a photography studio from home?
Yes, many photographers choose to run a photography studio from home as it can have many positive benefits in terms of cost, convenience and creative freedom. An at-home studio avoids the expense of renting or buying a separate studio space, making shoots way more cost-effective and convenient, reducing commuting times and having easier access to your equipment and any materials you may need.
An at-home studio also allows for more creative freedom, with the ability to control your schedule and workspace as well as choose your own background and lighting set-up. Lighting is integral to producing successful images; therefore, by having control of the quality of lighting you have, both artificial and natural, and the ability to choose your own backdrops, you can create perfect images every time.
Another benefit of having this dedicated studio space at home is that it can help any clients feel more comfortable, as a home environment can offer more privacy and safety than a rented studio space.
How much space do I need for a home studio?
The amount of space you need for a home photography studio all depends on the type of photography you plan to do. If your focus is product photography, then only a small space is needed, whereas if you plan to do portrait or fashion photography, you may need to dedicate a whole room to becoming a studio.
For product photography, a tabletop setup with space for a backdrop and a lightbox should be sufficient enough space. We suggest carving out a space of approximately 6 x 6 feet to allow for adequate room. However, this will depend on the type of products you are photographing, as some larger items like furniture or clothing may require more space.
If you’re creating a home studio for portrait photography, you will need to consider how much room you will need for your subject, a backdrop, lighting and space to move around. Ideally, if space allows, a room that is approximately 10 x 12 feet would be perfect for this. Keep in mind that you need a sufficient distance between the subject and the camera for the varying focal lengths for these shots.
Similarly, if you’re using this space for full-body shoots such as fashion shoots or for online content creation, a larger space will be needed. We recommend a room that is ideally 12 x 15 feet to allow space for lighting equipment as well as to provide sufficient distance between the model and the camera and give enough background separation to avoid shadows.
If you’re working with a smaller space, you can still achieve the at-home studio you desire with careful planning and versatile equipment. Using functional and space-saving gear like collapsible backdrops and portable lighting equipment can help you save space, as well as installing wall or ceiling hooks to hold backdrops.
What’s the best lighting setup for a home studio?
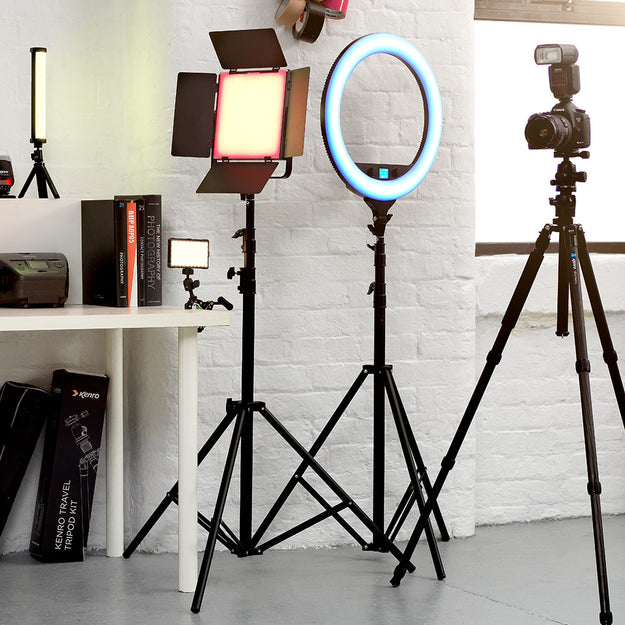
Whether you set-up your home studio in a room with good natural light or ample space for an artificial lighting setup, investing in quality lighting equipment, such as softboxes, light panels and sturdy light stands, can help you create the best professional-looking images. The best lighting set-up will of course depend on the type of photography you are producing and the room your studio is located in, however, below are a few key tips that can help you get the best, consistent lighting for your at-home shoots.
Adopt the three-point lighting setup
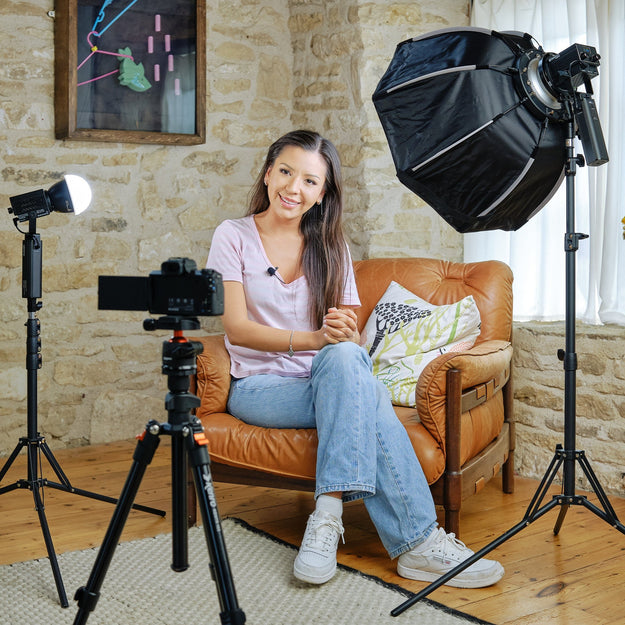
The base of the most versatile and widely used setup, the three-point lighting setup, consists of a key light to provide the most illumination, a fill light to balance shadows and a backlight to add depth to the image. However, if you are concerned with budget, using just a key light and fill light can be just as effective to create a great image.
The key light will usually use a softbox or umbrella to help diffuse the light and create a soft, more flattering light. The fill light is placed opposite the key light, operates at a lower intensity and will usually be a continuous LED panel, sometimes with a reflector. Finally, a back light should be placed behind the subject you are shooting to separate them from the background, and will usually be a small strobe or LED light.
Know the difference between continuous and strobe lighting
These two types of lighting will produce different effects on your images, and the one you choose will depend on the desired outcome you’re looking for. Continuous lights are great for beginners as they allow you to see an accurate representation of what the image will look like. This type of lighting is also great for video shoots, with LED panels, ring lights and softboxes being the most popular options.
Strobe lighting, however, is more powerful and requires a trigger/receiver setup. This type of lighting is perfect for those looking to create sharp, professional-looking images like studio portraits, fashion or commercial work, as it allows you precise control over the lighting. This type includes flashguns and monolights.
Make the most of natural light
If your at-home studio has lots of windows, you can use this spill of natural light to your advantage. When combined with reflectors to bounce back light onto your subject, you can create a soft lighting setup that is great for portraits and lifestyle shots. This is also more cost-effective to help you create great quality images without spending too much on equipment.
If you are curious about the type of lighting equipment available, below are just a few of the options available here at Kenro that can help you create the perfect lighting setup for your home studio.

Kenro Smart Lite Bi-Colour LED Light Panel
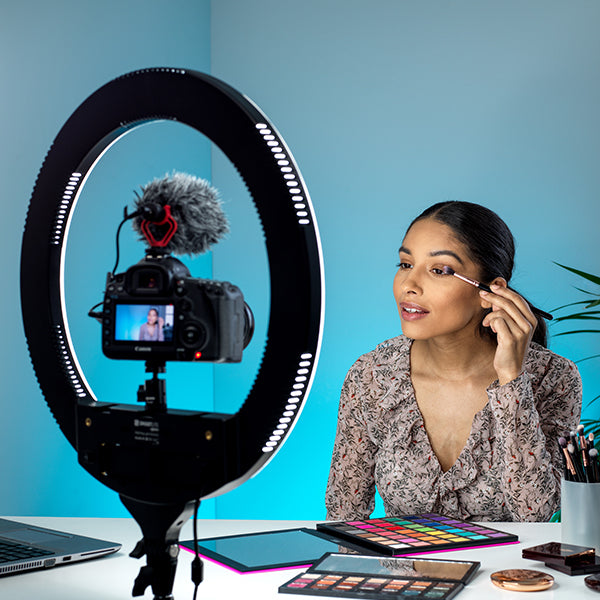
Kenro Smart Lite 19" RGB Ring Light Kit
Get home studio photography equipment from Kenro
Set up your at-home photography studio with ease using the equipment available here at Kenro. From studio lights to camera filters and tripods, we’ve got everything you need to capture the perfect shots every time.


