When it comes to capturing professional-quality images, lighting is everything. Whether you’re photographing portraits or products, understanding how to control and shape light is the key to getting the perfect shot. For those new to studio photography, perfecting lighting can seem a little intimidating at first, with an array of equipment, terminology, and techniques to navigate. That’s why we are here to help you grasp the basics of studio lighting to open up a whole new world of creative possibilities behind the lens.
Read on as we break down the essentials of studio lighting, from getting to know the different types of lights and modifiers to understanding how positioning, intensity, and direction affect your final image. Whether you’re a photography enthusiast looking to experiment or an aspiring professional taking your first steps, we’ll cover everything you need to start building confidence in a studio setup.
What’s the difference between hard and soft light?
Understanding the difference between hard and soft light is one of the core concepts in studio photography, and it makes a huge difference to how your images turn out. Below, we have outlined a clear breakdown of both lighting techniques, discussing what each is best used for and the type of image it will create.
Hard studio lighting
Hard lighting typically comes from a small, direct light source like a bare bulb or an unmodified flash head. This type of lighting creates strong, well-defined shadows with sharp edges that accentuate textures, shapes, and details in your images. Lighting in this way can be great for dramatic portraits and product shots, helping you to create a high-contrast, edgy look. However, it’s important to note that this lighting technique may also be unforgiving when it comes to photographing people, as it may highlight skin imperfections or create harsh shadows on a subject’s face.
Soft studio lighting
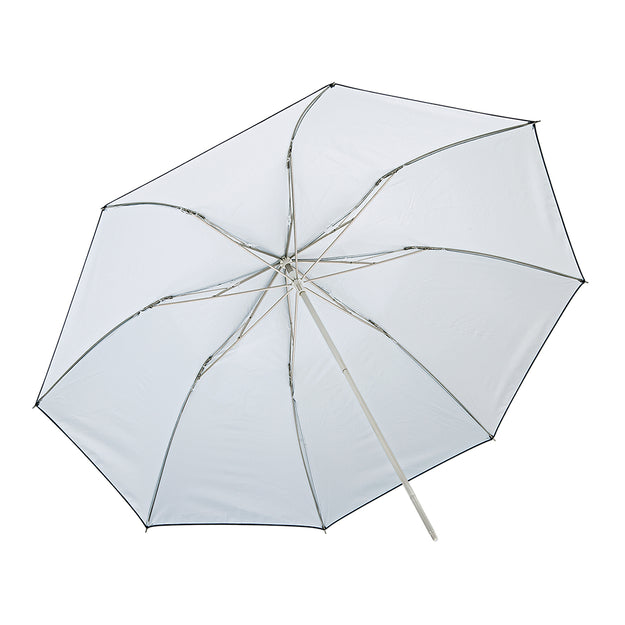
On the other hand, soft lighting is created using larger light sources, or by diffusing light through modifiers like softboxes, umbrellas, or diffusion panels. This will produce gentle, diffused shadows that give gradual, subtle transitions between light and dark parts of the image. Perfect for creating flattering portraits, this lighting helps to smooth out skin tones and reduce the appearance of blemishes. This lighting is also ideal for food, product, and lifestyle photography, giving you a clean, natural, and evenly lit look. Keep in mind that the bigger the light source is compared to your subject, the softer the lighting of the image will be.
How do I eliminate shadows in portraits?
If you’re practising portrait photography in a studio set up, knowing how to eliminate shadows from your images can make all the difference to the final products. Removing shadows from portraits is all about being able to control your light sources, knowing the correct position and level of diffusion to create the perfect image. Below are a few of our best tips for softening shadows in portrait photography.
Use a diffused light source
The larger your light source is compared to your subject, the softer the shadows will be. A softbox, umbrella, or diffusion panel can help to spread the light, reducing harsh shadows on the face or background.
Adjust the angle of your light
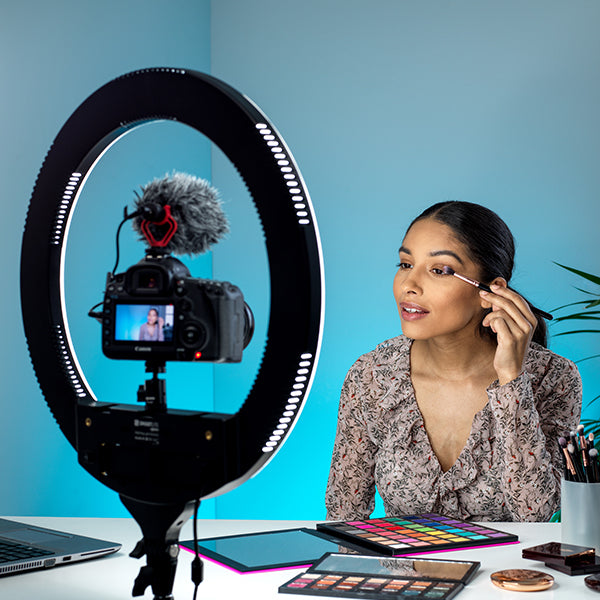
Positioning your main light source directly in front of your subject, rather than from the side, will help to minimise any facial shadows and create a softer image. The best lighting for this is a ring light; however, it's important not to overexpose the image as it can flatten features, therefore, you should adjust your light intensity and settings accordingly.
Use a fill light or reflector
If shadows fall onto the background of your image, a small fill light or reflector can help to separate your subject from the background and reduce those unwanted dark patches. A fill light is a secondary, softer light that is placed opposite your main light to lighten any shadows. If you don't have a second light, a reflector can bounce light back into the shadow areas to help even out the exposure.
Top tip: Remember that you don’t always need to eliminate shadows; sometimes soft, directional shadows can add a welcome depth and dimension to a portrait. The key is to control shadows to suit the mood and style of the image you’re aiming for.
What is the best lighting for studio photography?
The best lighting for studio photography all depends on your individual goals, the style of photography you prefer and what the subject of your image is. However, the two most common lighting options for studio photography are continuous lighting and strobe lighting (flash).
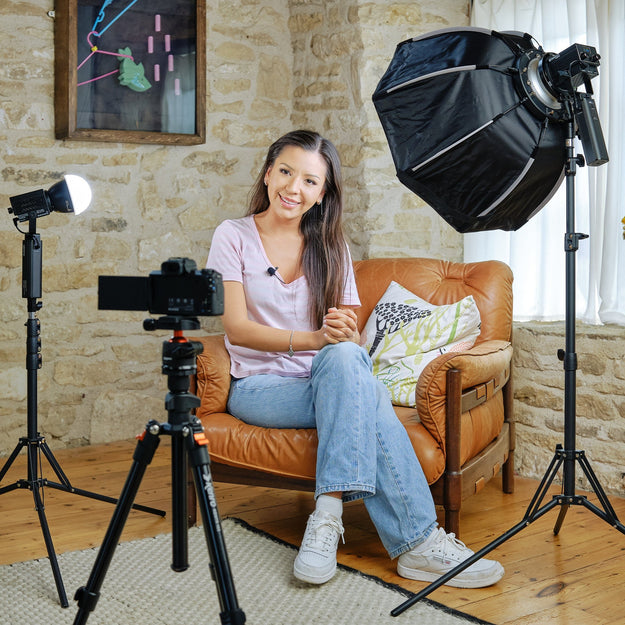
A continuous light source will stay on constantly throughout the shoot, providing a consistent level of lighting. These lights are often LED panels, softboxes and continuous bulbs like ring lights and are great for beginners or for producing video, as you have control over exposure and light intensity. Whereas, a strobe lighting source provides individual bursts of light from a flashgun and can be a more powerful lighting source. This type of light is great for freezing motion, and so is useful when shooting a moving subject, however, it gives you less control over the final image and requires more of a learning curve.
No matter what light source you choose, adding modifiers such as umbrellas, reflectors, and softboxes can all help you manipulate the light to fill in shadows, soften edges and highlight specific parts of the image.
Studio photography lighting techniques
Lighting techniques are also key to producing great studio images and can help transform ordinary shots into something striking.
One of the best lighting techniques for studio photography is the three-point lighting method. This lighting technique is all about creating a three-dimensional look, by placing three light sources at strategic points around the subject you’re photographing.
Each light source illuminates a different part of the subject to create an image that has depth and dimension. The three light sources are:
-
Key light - This is your primary lighting point, and should be placed at a 45-degree angle to the subject. This is the brightest light source in this setup and is crucial for creating depth by illuminating the subject and establishing the exposure of the image
-
Fill light - This light is used to opposite the key light to soften any shadows and is usually a less intense light to prevent it from overpowering the key light, creating a more balanced light distribution
-
Backlight - This light is placed behind the subject to create a separation between the background and the subject to produce a three-dimensional image.
Kenro Smart Lite 19" RGB Ring Light Kit
Kenro Smart Lite Bi-Colour LED Light Panel
Other effective studio lighting techniques include:
-
Rembrandt lighting - This technique is where you place one light at a 45-degree angle to the subject to create a slight shadow. This creates an image that is natural but also compelling, adding contrast and depth that enhances the subject’s features. This technique can be adapted to various subject types and poses, making it a versatile method for both product and portrait photography.
-
Butterfly lighting - Also referred to as ‘Paramount lighting’, this technique requires the light to be placed directly above and in front of the subject, and in the centre of their face if photographing a person. This creates a soft shadow under the nose that resembles a butterfly. This method is great for beauty work as it is known for its flattering effect in portraits, creating a soft, diffuse effect that can be slimming on the face.
-
Clamshell lighting - This technique uses two lights, one above and one below the subject, to create a soft, even, and flattering light. This is often a softbox above, and a softer second light below or a reflector. This setup minimises shadows and smooths out imperfections, making it perfect for close-up shots.
Perfect your studio lighting with Kenro
Now that you’ve mastered the fundamentals of studio lighting, it’s time to start creating beautifully lit photographs with ease. Browse through our full collection of photography lighting equipment to find the right solutions for your next studio shoot.


