We've all been there. You've seen your friend's gorgeous new gallery wall filled with glorious photographs of friends and family and though to yourself, 'I would love one of those'. Then you get back home, look at your sitting room wall and sign, 'where do I even start?'. That's where Kenro can help!
1. Pick Your Frames
Minimal, chic, thin frames with monochromatic imagery.
Perfect for those that love plain walls, neutral tones and uncluttered spaces. Our lightweight, plastic Frisco frames are ideal for this with their thin, slightly bevelled frame. Available in a huge range of sizes making it easy to frame exactly what you need.
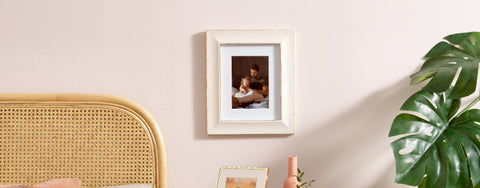
Maximal, grand, decorative frames with painting, prints and photography.
Ideal for homes decorated with a sense of opulence. Looks great on rich, dark coloured walls. We have a beautiful range of warm toned frames that are perfect for this kind of gallery wall. From our Bergamo Rustic Brown to our Harmony Woodland Series and our Rio Collection.
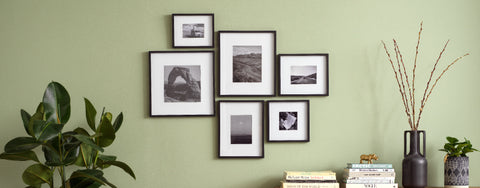
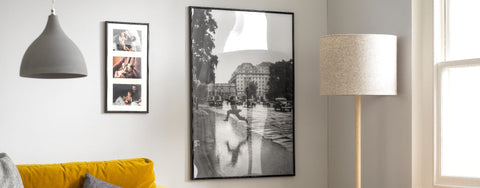
Bold, clean, aluminium frames with crisp white mats.
Great for creating a cohesive look with a strong studio-style aesthetic. Suits a wide range of interior styles. This look can be so easily made with our clean yet bold Strata Frames, available in both black and white to suit any decor style.
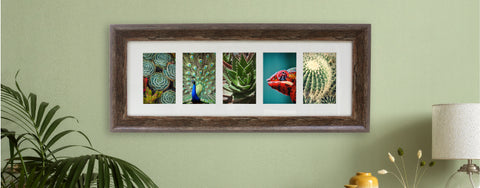
Eclectic, mismatched frames with quirky images.
Brilliant for creating a high-impact gallery wall. Works particularly well on a neutral pained or wallpapered background, allowing the imagery to do all the talking. Choose an array of similarly styled yet different frames in order to create this quirky look; we love the combination of our Clifton Frames in White, with the Toulon Woven Frame.
2. Print Your Images
So now you've picked your frame style, it's time to get planning your design. You've probably already got an idea of the photographs you'd lie on your wall; maybe you've got some saved up from your wedding day, or perhaps there are a stack of your children over the years tha you'd loive to look back on as you walk up the stairs.
Whatever they are, get them printed on good quality photo paper, either at home or using one of the many excellent print services around. Try Photobox, Snapfish or Bonusprint online, or pop into your local print shop, Boots, Asda or Tesco.
3. Create Your Layout

Find some space on the floor or another large surface and start to lay out your frames. Use a tape measure to help get the spacing just right. Don't forget to snap a photograph on your phone to remember where everything went before you start putting them on the walls!
4. Measure Up and Place Hooks
Use your tape measure and a pencil to make out where your hooks need to go. An easy way to do this is to take a piece of paper the size of your frame and mark where the hanging hooks need to go. Tack this to your wall (referencing the layout photo you took) and tap in your hooks, picture pins or brackets with a hammer.
5. Hang Your Frames
Now all that's left is to get those frame on your wall! A spirit level is always helpful during this stage to make sure you frames are hanging just right. And there you have it. Project complete! A stunning gallery wall upon which to share your favourite images. The beauty of this project is you can change out the images, artwork, photographs or other framed memories as often as you like - a quick way to change up any space.


